[no_toc]

Installing RES HyperDrive step by step
Download the Res Hyperdrive software
First I downloaded the RES Hyperdrive software from website of RES Software. (Download).
Next I am going through the import process of the Virtual machine into XenServer.
This is a basic procedure, but still I will run you through it. It’s like a Next Next Finish part, but, archhh, just to be complete…
[jaccordion size=”normal” theme=”cupertino”]
Install the virtual appliance in XenServer::
Install the virtual appliance in XenServer
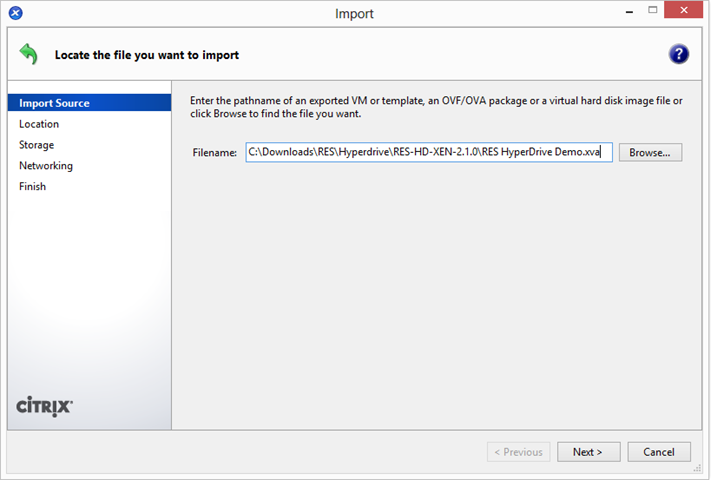
- Open XENCenter console and selected Import. Select the .xva that you have downloaded.
- Select the XenServer you want to install the virtualappliance on. So in my case I will select the XS6-NODE1.
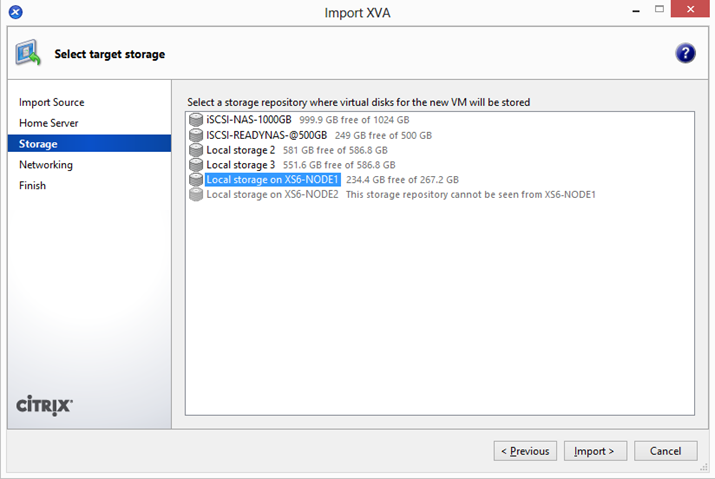
- Select the storage you want to use for the virtual disks..
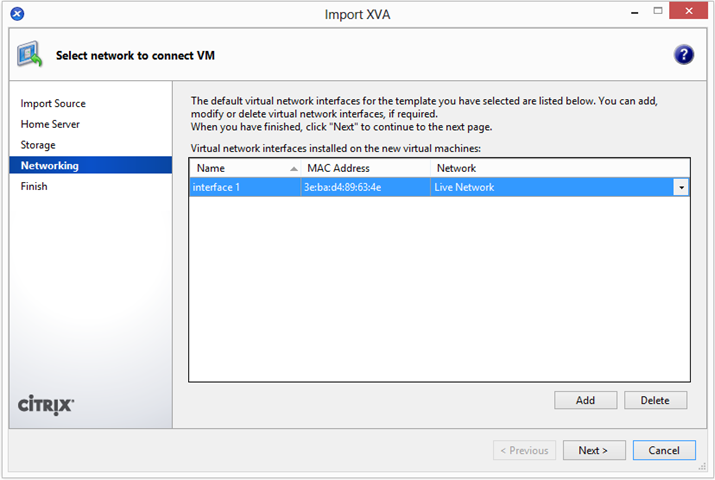
- Select the Network interface you want to assign to the virtual appliance. (Multiple nics are supported)
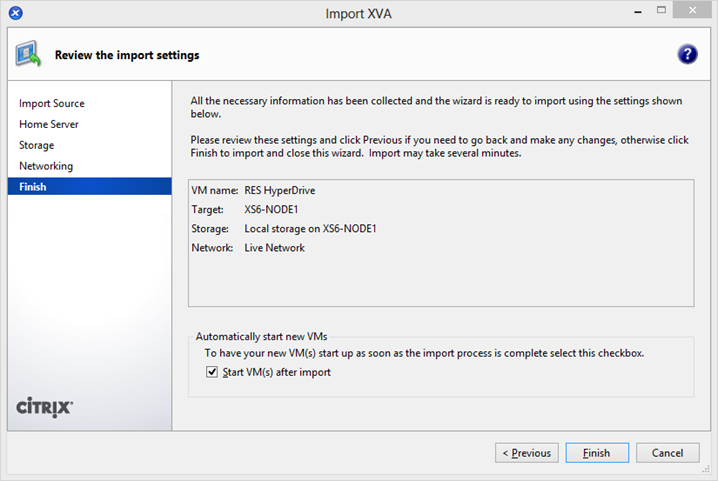
- Lets finish up and click finish.
[jcolumns model=”2,2,2,2,2″ inbordercss=”1px dotted gray”]
[-1-]
[jcol/]
[-2-]

[jcol/]
[-3-]
[jcol/]
[-4-]
[jcol/]
[-5-]
[/jcolumns]
[jacc/]
Install the virtual appliance Console (part 1)::
Install the virtual appliance Console (part 1)
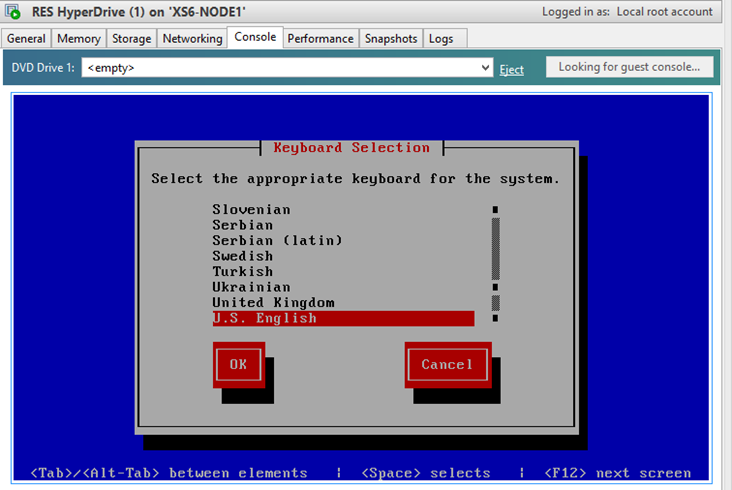
- Wait for the Boot sequence to complete.
- Select the keyboard layout. Use the tab keys to navigate to the OK button and use the enter key to confirm.
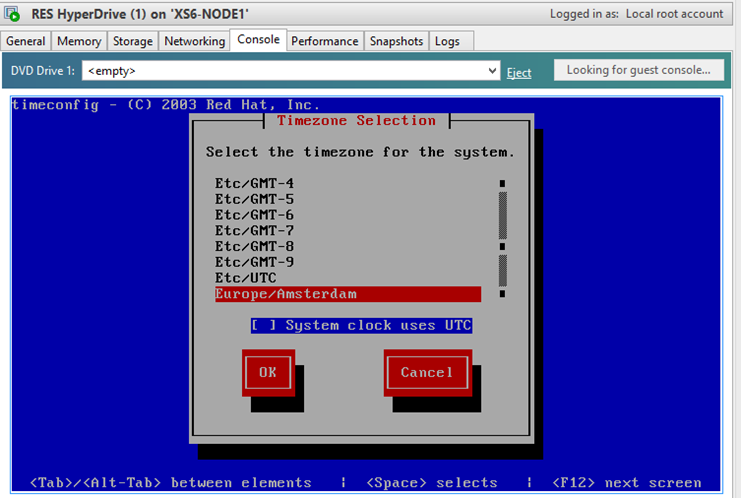
- Select your timezone.
- After you entered the new root password and confirmed the password again. You are ready to finalize the RES Hyperdrive installation.
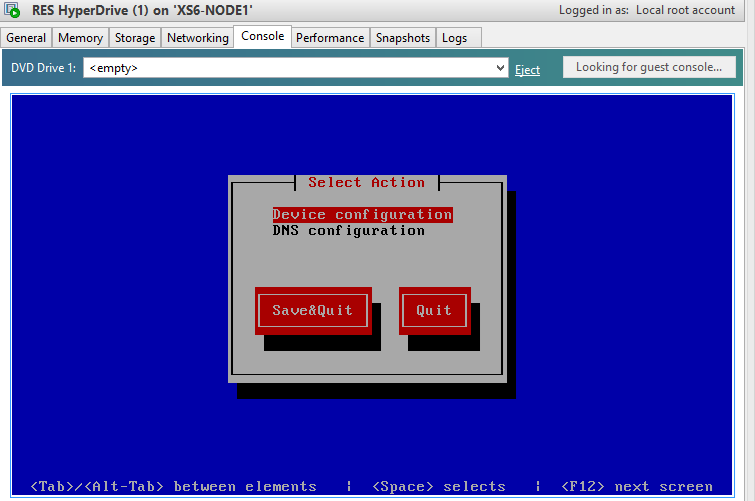
- Press Enter to configure the device configuration
[jcolumns model=”2,2,2,2,2″ inbordercss=”1px dotted gray”]
[-1-]

[jcol/]
[-2-]
[jcol/]
[-3-]
[jcol/]
[-4-]

[jcol/]
[-5-]
[/jcolumns]
[jacc/]
Install the virtual appliance Console (part 2)::
Install the virtual appliance Console (part 2)
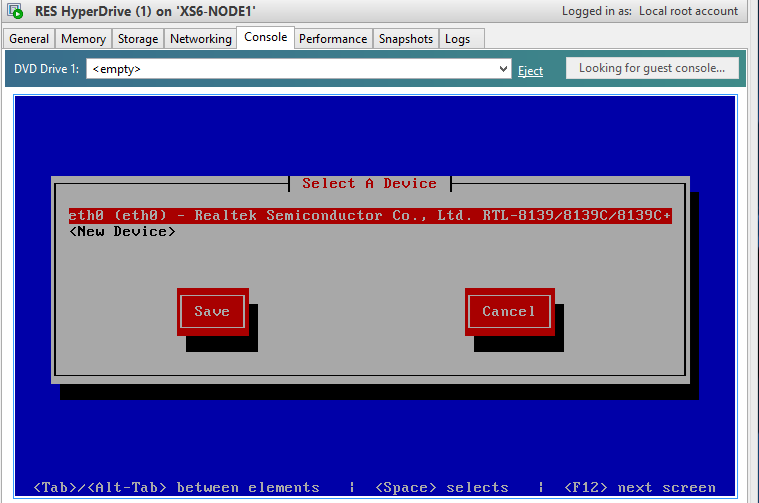
- Select the appropiate Network interface card and press enter to configure it.
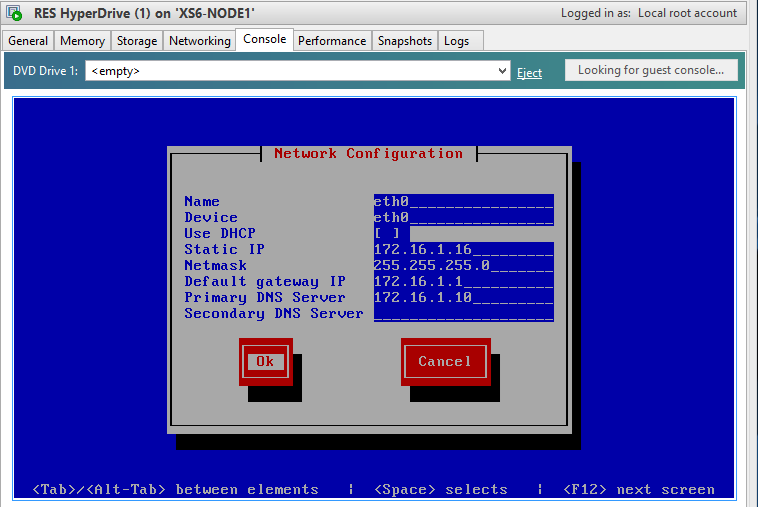
- Configure the IPAddress settings or leave it on DHCP, and confirm the settings by selecting OK.
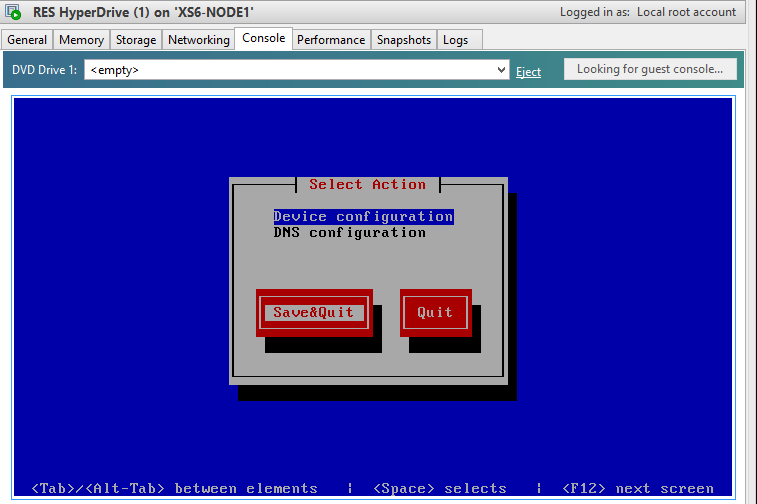
- Select Save to save the device configuration.
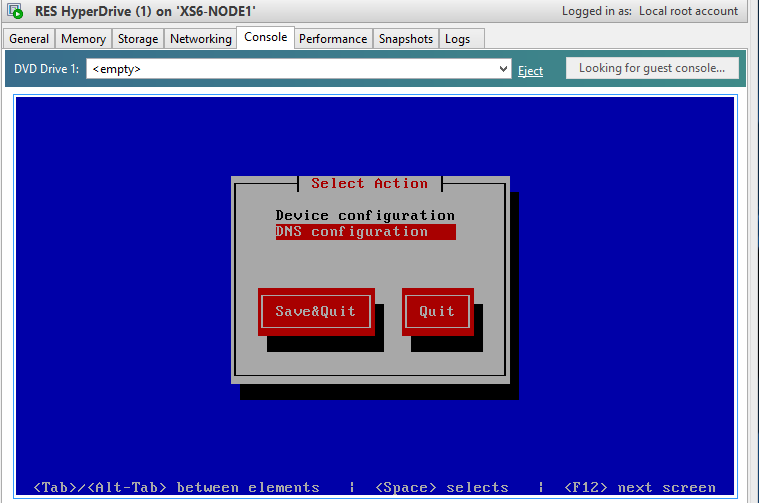
- Now select the DNS configuration and press enter to configure it.
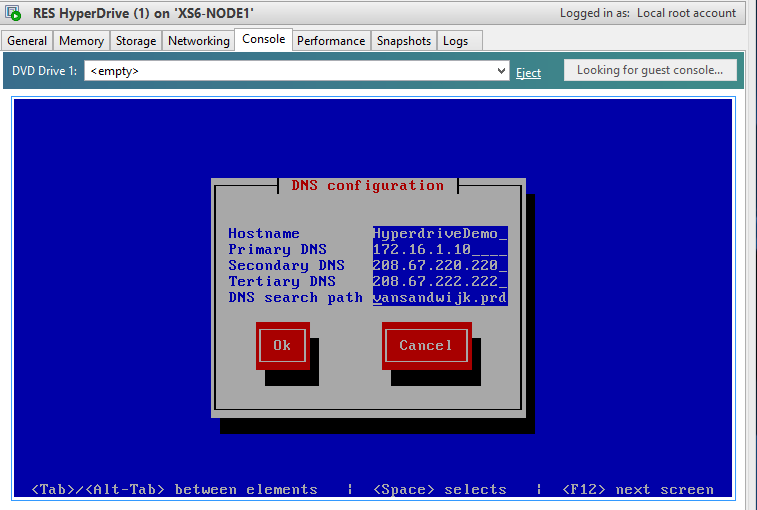
- Fill in the hostname, DNS Servers and the DNS Search path. Select OK to confirm it.
[jcolumns model=”2,2,2,2,2″ inbordercss=”1px dotted gray”]
[-1-]
[jcol/]
[-2-]
[jcol/]
[-3-]

[jcol/]
[-4-]
[jcol/]
[-5-]
[/jcolumns]
[jacc/]
Install the virtual appliance Console (part 3)::
Install the virtual appliance Console (part 3)
- Select Save and quit to confirm all the configuration.
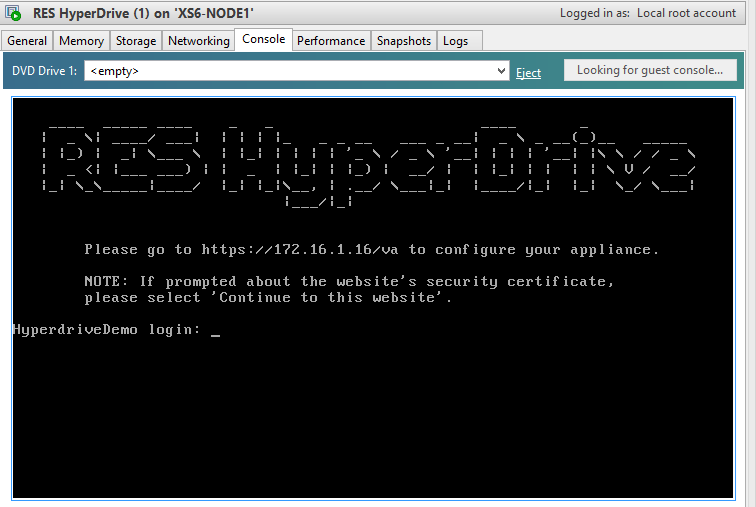
- The virtual appliance is now configured and ready to use.
[jcolumns model=”2,2″ inbordercss=”1px dotted gray”]
[-1-]
[jcol/]
[-2-]
[/jcolumns]
[jacc/]
Configuration of the Device using the webinterface (part 1)::
Configuration of the Device using the webinterface (part 1)
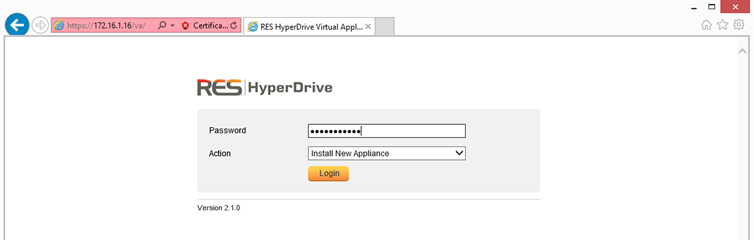
- Go to the webinterface using https://IPAddressOfHost/va and login with the Root Password you entered earlier, and make sure the Install New Appliance option is selected.
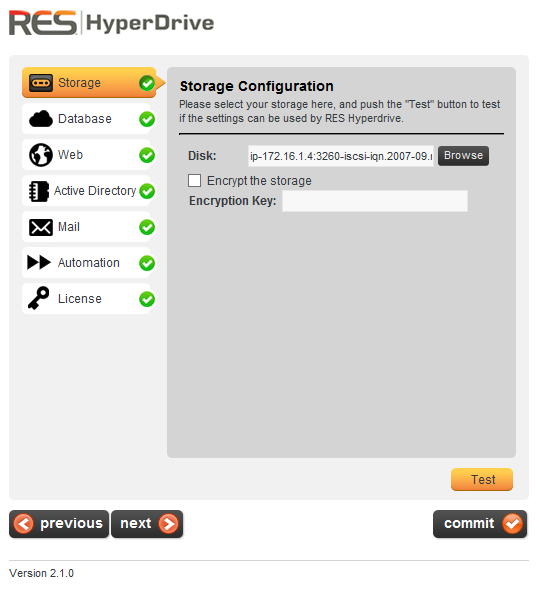
- Select the storage to be used (you can add local storage or add an ISCSI target by clicking browse.) and click TEST. The green check mark will appear if all is OK.
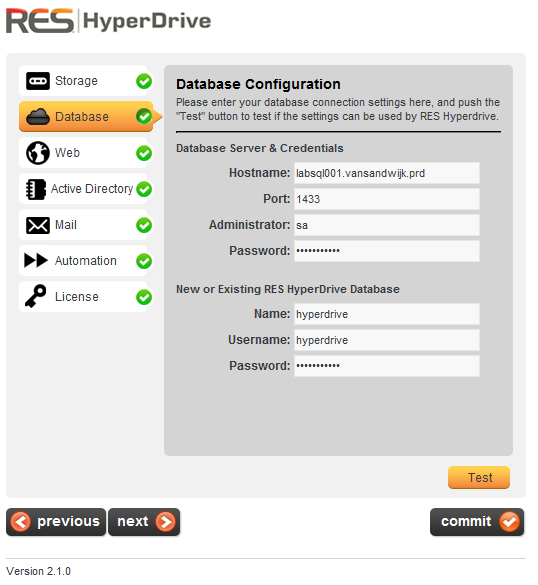
- Fill-in the SQL Database settings and the database name, database username, database username password. If the database and/or username do not exist. They will be created for you. After you entered all the necessary settings, select TEST to test the settings. The green check mark will appear if all is OK.
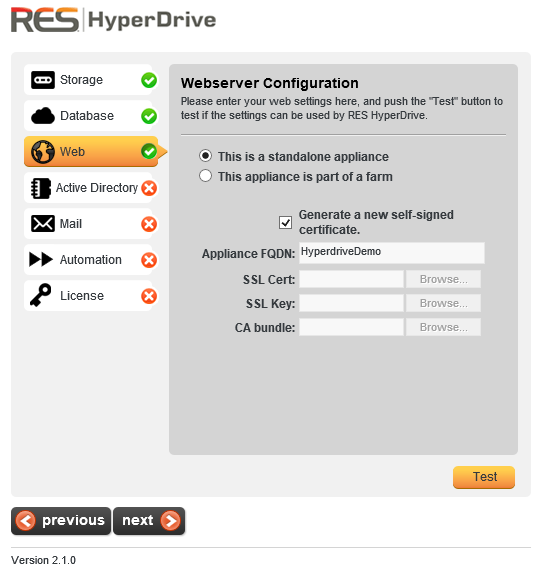
- Select the Appliance type (standard or Part of a farm) and fill the FQDN of the host, check the create self signed certificate or upload an existing certificate, and click TEST. The green check mark will appear if all is OK.
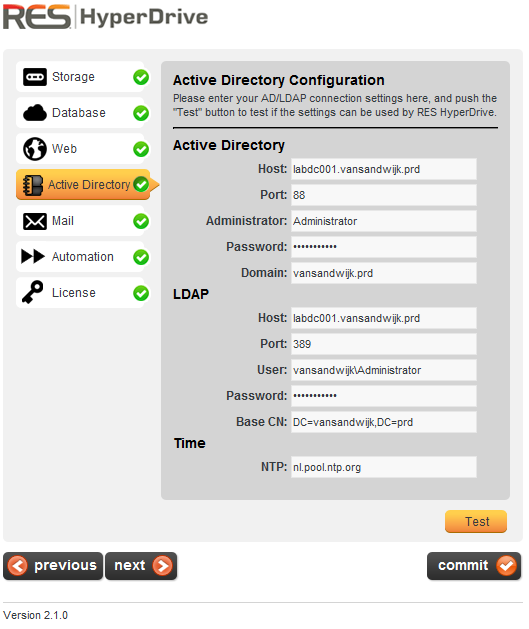
- Fill-in the Active Directory settings and credentials to be used, and click TEST. The green check mark will appear if all is OK.
[jcolumns model=”2,2,2,2,2″ inbordercss=”1px dotted gray”]
[-1-]
[jcol/]
[-2-]
[jcol/]
[-3-]
[jcol/]
[-4-]
[jcol/]
[-5-]
[/jcolumns]
[jacc/]
Configuration of the Device using the webinterface (part 2)::
Configuration of the Device using the webinterface (part 2)
- Configure the mailsetings (SMTP server, SMTP port, sender emailadress, admin emailaddress), and click TEST. The green check mark will appear if all is OK.
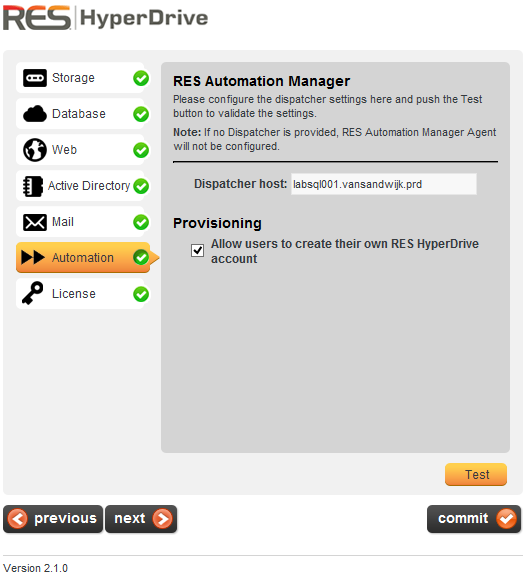
- If you use automation manager, enter the settings for RES Automation Manager, tick the checkbox if you want users to create there own spaces else leave it unchecked and click TEST. The green check mark will appear if all is OK.
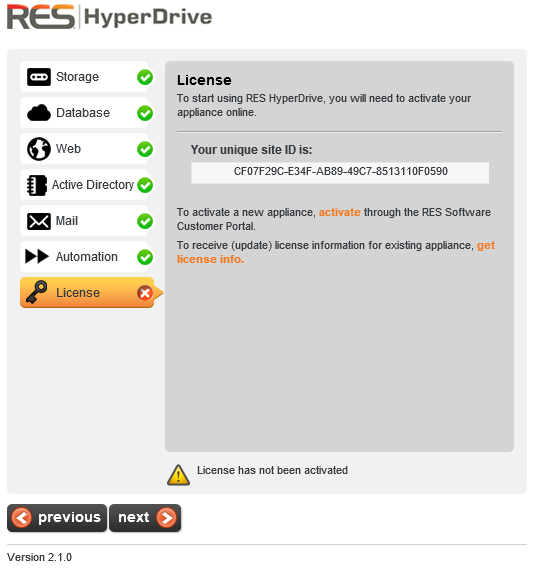
- At the licenses tab click activate, to activate the license. In this session I will show you how an activation of a evaluation version is processed.
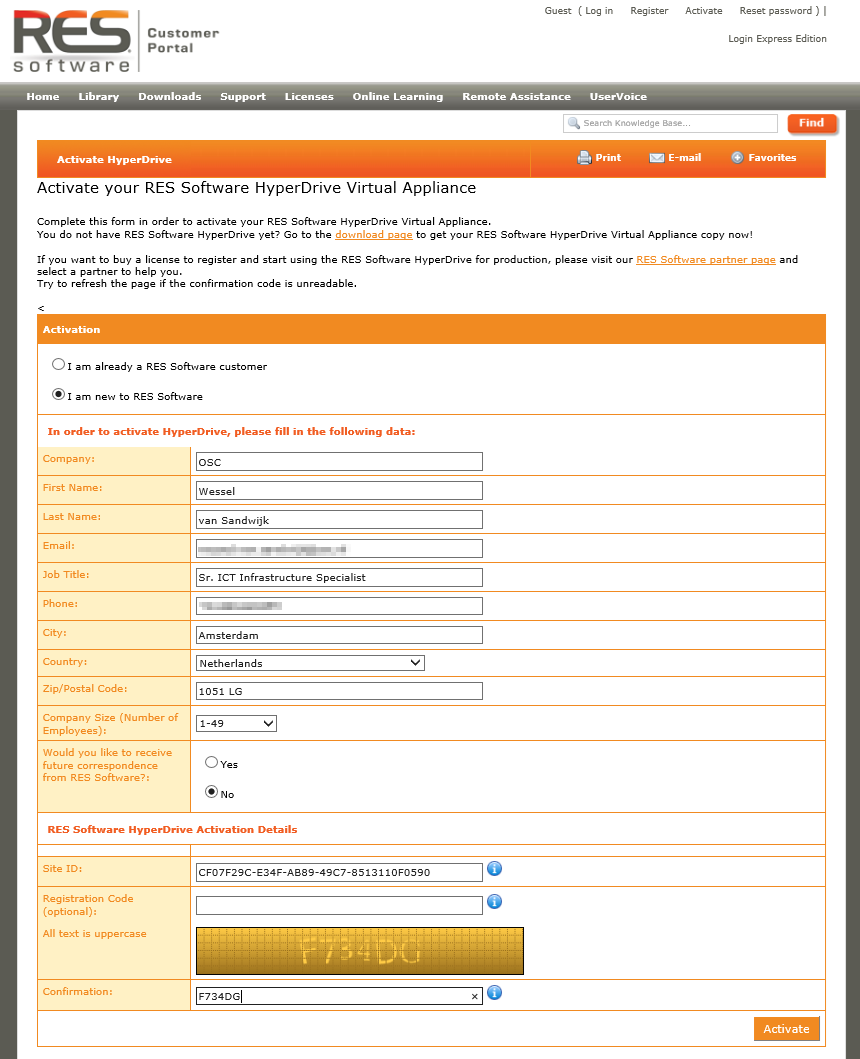
- The RES Software website is opening. If you are an existing user and you allready have RES Hyperdrive licenses use the I am allready a customer option and login with your credentials, else select the I am a new customer option and fill in all the necessary field to complete the evaluation version registration, and click activate.
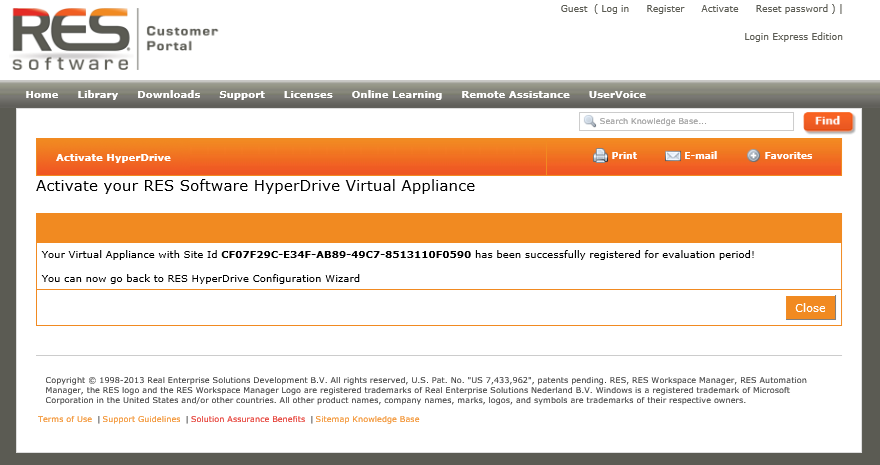
- Click close after the registration is completed.
[jcolumns model=”2,2,2,2,2″ inbordercss=”1px dotted gray”]
[-1-]

[jcol/]
[-2-]
[jcol/]
[-3-]
[jcol/]
[-4-]
[jcol/]
[-5-]
[/jcolumns]
[jacc/]
Configuration of the Device using the webinterface (part 3)::
Configuration of the Device using the webinterface (part 3)
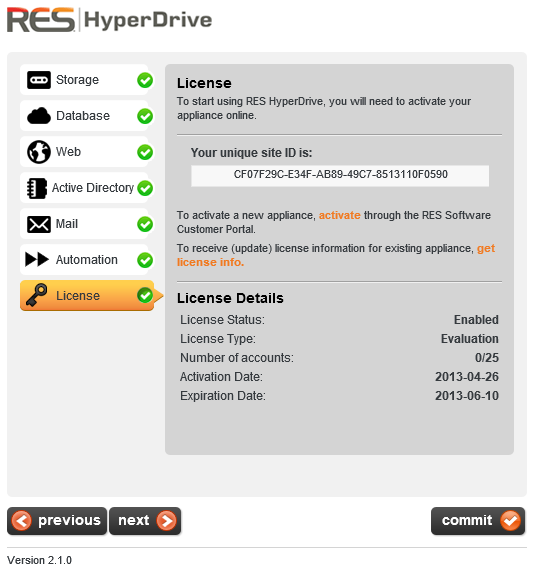
- Click Get license info to fetch the license information from the RES Software Activation website. The green check mark will appear if all is OK.
- If all the check marks are green, click Commit. Confirm that the Harddrive or ISCSI target will be erased to proceed.
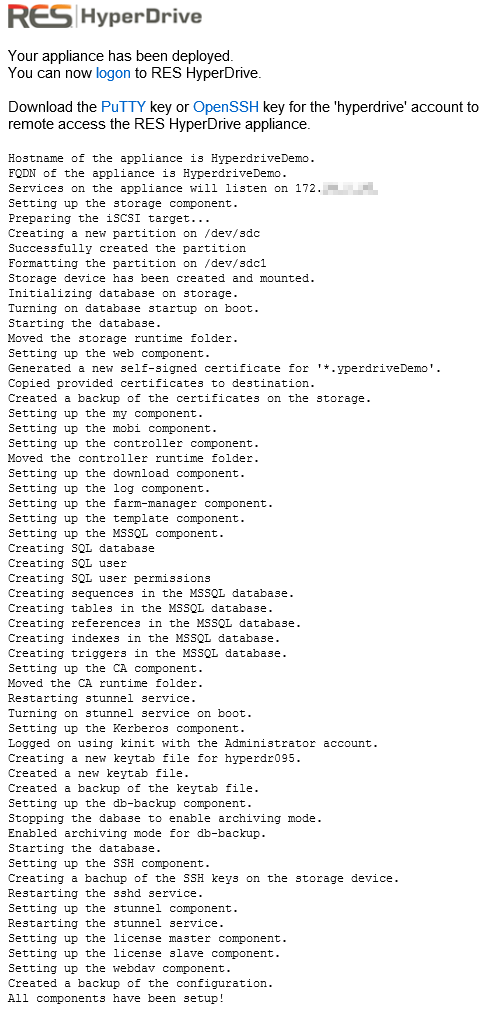
- Wait for the installation process to complete (takes up to 3 minutes to complete.
[jcolumns model=”2,2,2″ inbordercss=”1px dotted gray”]
[-1-]
[jcol/]
[-2-]

[jcol/]
[-3-]
[/jcolumns]
[/jaccordion]
After you finished the configuration as I showed you above, the installation of RES Hyperdrive is completed, and is ready to Use. !!!
The next part is an view of how the manage the RES Hyperdrive and all the users and there teams and spaces….
How to manage the RES Hyperdrive appliance and there users.
Keep watching this will follow shortly….